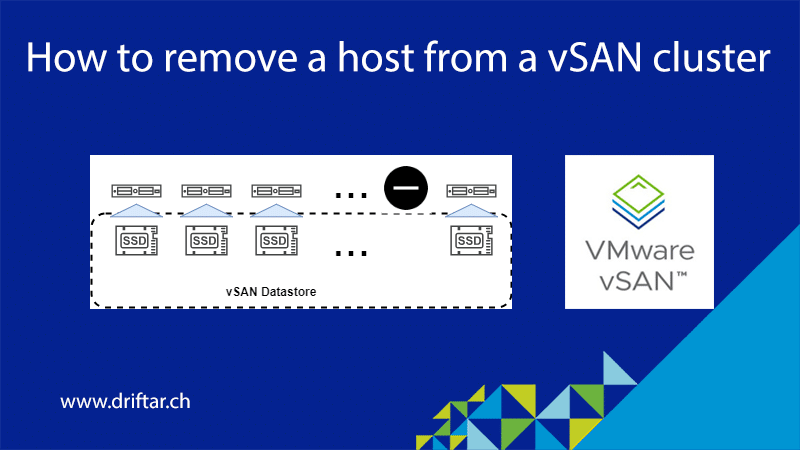
This blog post, I call blog posts like these “quick & dirty posts”, will show you today how to remove an ESXi host permanently from your vSAN cluster. Yes. Permanently. Forever.
Usually, you’re adding more capacity to a cluster, which means adding more hosts or disks to solve that problem. However, some legitimate reasons exist to remove an ESXi host from a vSAN cluster. Maybe you’re currently in the middle of a hardware renewal. The new hardware is already installed and running in production. And now, server by server, you’re removing the old hardware because you’re on track with the workload migration. The same counts for adding a cluster with nodes that have more “meat by the bone”, more compute power, and storage capacity. Nodes that are running more energy-efficient than the old ones. You see, only two reasons, but there might be many more.
But let’s dive into this topic now.
How to remove an ESXi host from a vSAN cluster?
We’re starting with making sure that the cluster and the disk groups have enough space to have one host removed. If the cluster is fine, let’s move on to remove the host.
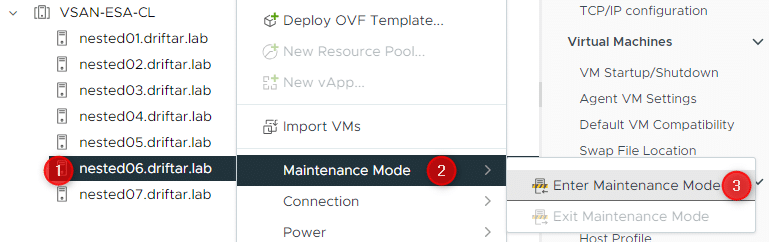
Place the host into maintenance mode
Right-click the host, choose “Maintenance Mode”, then “Enter Maintenance Mode”.
Make sure you’re choosing “Full data migration” from the drop-down list. We’re going to decommission this host, so no data shall remain on it!
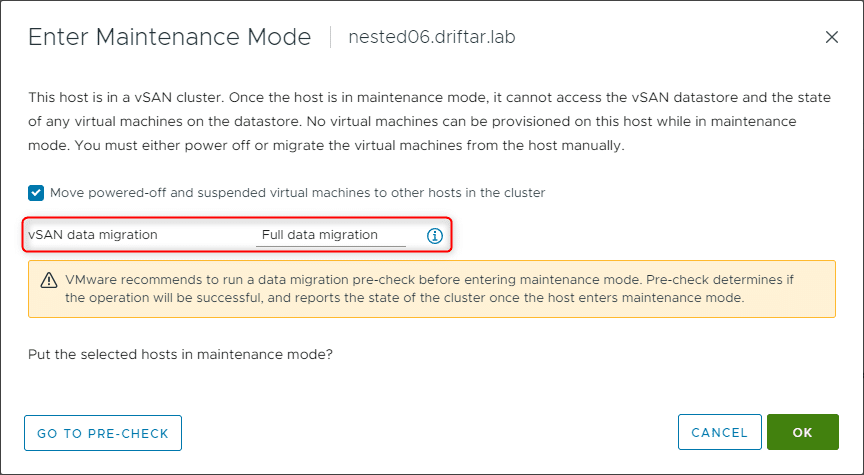
It’s also a good idea to move powered-off and suspended VMs off that host. But also currently running VMs will be moved (automatic DRS/vMotion for the win!).
Depending on the amount and size of virtual machines that are (were) stored on this host (not to forget if you enabled the vSAN file service), this process will take a while. You can see the progress in the “Recent Tasks” area down below in the browser.

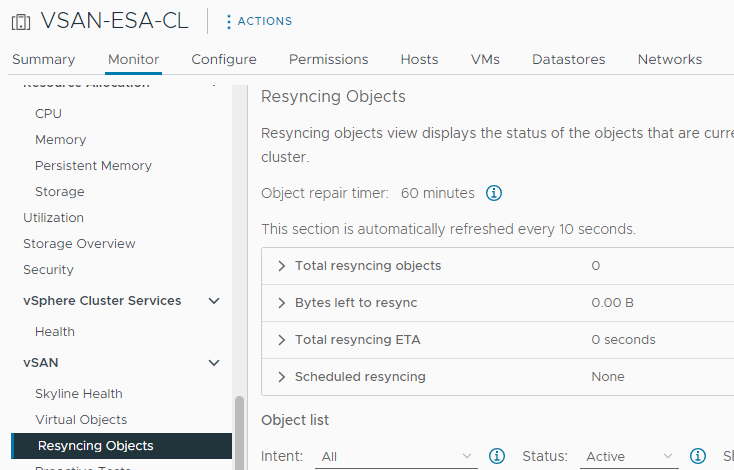
Make sure you check the status of the “Resyncing Objects” from time to time, and check that the host entered maintenance mode correctly, to make sure that’s finished and all good before proceeding with the next step!
Remove the disk(s) from the cluster
I’m not quite sure, to be honest, if it is still needed to remove the disk(s) from the cluster too, as it has been done in vSphere 7 and earlier, where you deleted the disk group(s). I removed the disk, and it worked fine.
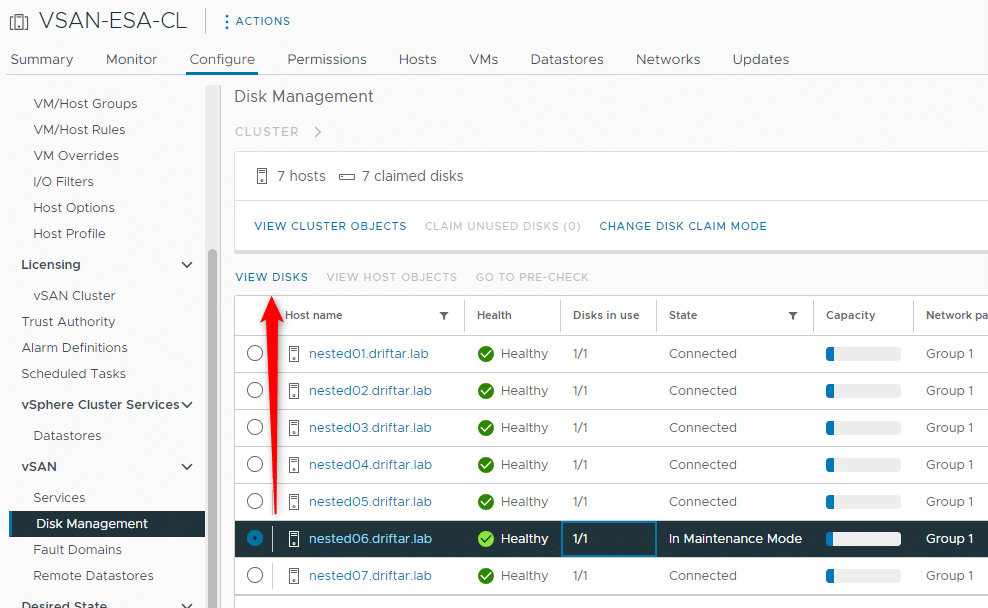
Go to the cluster, click the “Configure” tab and navigate to the “vSAN Disk Management”. Select the affected host (its state should be “In Maintenance Mode”), then click “View Disks”.
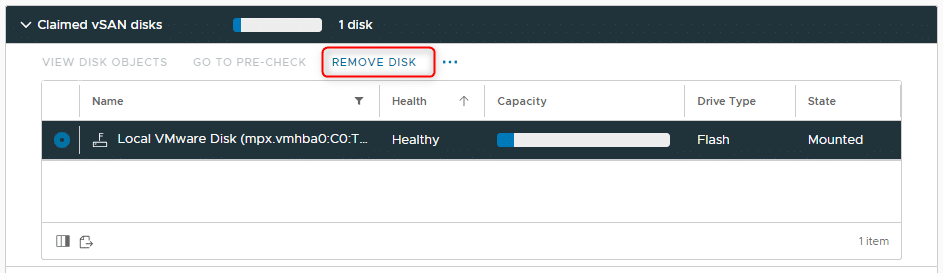
Next, select the affected disk, and click “Remove Disk” just above the list. Repeat this step if you have more than one disk that should be removed from the vSAN cluster.
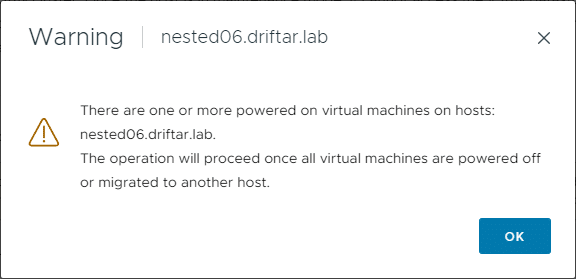
One last warning. You placed the host into maintenance mode with full data evacuation as the first step. So this shouldn’t concern you. Maybe the last resort if you DID NOT select the full data evacuation…
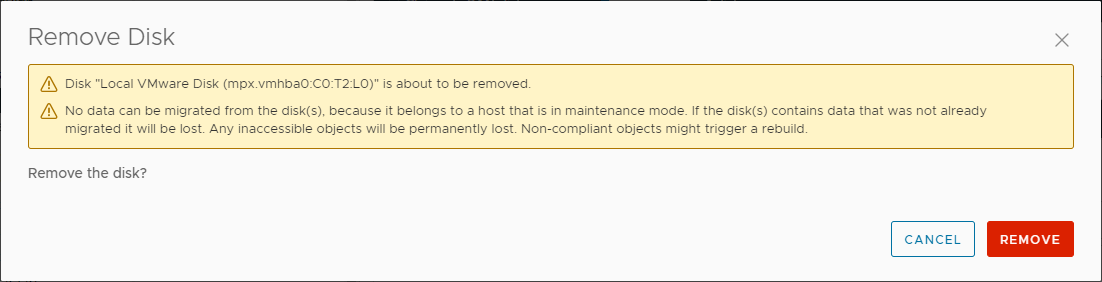
You can see the progress of the disk(s) being removed from the storage pool in the “Recent Tasks” area down below the browser. Depending on disk size, type, etc. it may take a moment.

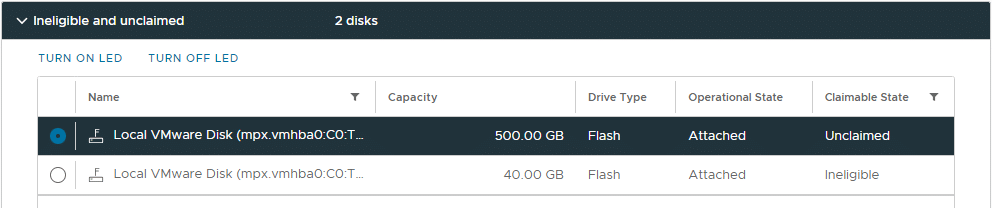
Still in the same “View Disks” area as in the step before, you should see that the disk(s) you just removed are now “Unclaimed”.
Remove the host from the cluster
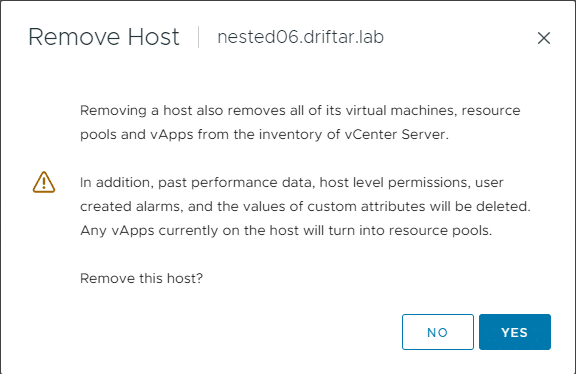
It is now time to remove the affected host and put him to rest.
You could just pull it out of the vSAN cluster to some other cluster (or as a standalone host) with drag & drop, or, as I like to do it, remove it from inventory. You may even run the esxcli vsan cluster leave command from the command line to leave the cluster. Many ways lead to Rome, and also, many ways to disassociate the host from vSAN. In this fictional scenario, we want to reduce the cluster size because we have built a new cluster with new hardware. And so we also want to dismantle the old hardware piece by piece.
Right-click the host and select “Remove from Inventory”.

A last farewell salute, and with a click on “Yes”, the host is gone.